Medically Reviewed By
Jennifer Martin-Biggers, PhD, MS, RDN
Registered Dietitian Nutritionist
Jessica Bippen, MS, RD, teaches us how to make nut milk. Experiment to tailor homemade nut milk to your liking, or follow her naturally sweetened vanilla cashew milk recipe.
Have you ever tried making nut milk at home? While it may seem super convenient to just grab your favorite plant-based milk off the grocery store shelf, once you go homemade, you may never go back to store-bought!
Seriously! Making homemade nut milk is much easier than you think. In just six steps (or less!), you can have fresh, creamy nut milk whenever you need it. Plus, it tastes better, has fewer ingredients, and can be customized to your taste preferences. Read on to learn how to make any kind of nut milk, the DIY benefits, and get to making our favorite cashew milk recipe.
How to Make Nut Milk
The steps couldn’t be easier. All you need is a blender and about 15 minutes. To keep it simple, here’s how to make homemade nut milk:- Choose raw nuts.
- Soak the nuts (or don’t!).
- Drain and rinse the soaked nuts.
- Blend the nuts with filtered water.
- Strain the nut milk (if necessary).
- Refrigerate and enjoy!
Tips + Techniques
Now to elaborate, this DIY isn’t complicated. Actually, it’s pretty hard to mess up. That being said, here are some tips to ensure you make the best nut milk every time.Choose raw nuts
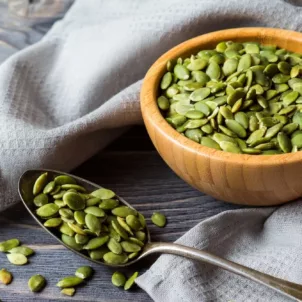
Raw nuts are the best to use since they soften much better than roasted nuts and make for a light, clean flavor.Avoid skins when possible
It’s best to use skinless nuts, like cashews or macadamia nuts. Otherwise, select a blanched variety of almonds, hazelnuts, or peanuts. This makes for a smoother texture and reduces the need for straining.Soak the nuts (or don’t!)
Soaking the nuts makes them easier to blend. Doing so can be as easy as placing them in a bowl and covering them with water until the morning. However, I know that’s not helpful if you need nut milk now! A quicker option is to cover the nuts with boiling water and let them soak for 10 minutes. You can also forgo the soaking if you have a high-speed blender. Run the blender for two to five minutes to ensure the nuts break down completely, with no soaking required.Strain the nut milk (if necessary)
Skinless nuts, such as cashews and macadamia nuts, don’t require straining. You may find that you can also get away without straining blanched nuts. However, most nuts tend to be more fibrous, leaving a pulp behind when blended. For that reason, you might prefer taking the extra step of running the milk through a cheesecloth or nut milk bag to ensure it’s silky and smooth.Keep it plain or Add Flavor
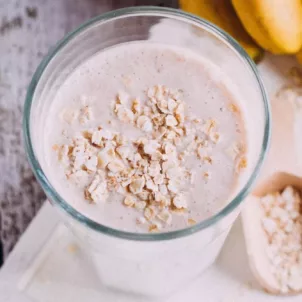
The cleanest, best nut milk will contain just nuts and filtered water. However, feel free to make it your own! Try adding a few teaspoons of sweetener like maple syrup or honey, a pinch of salt to enhance the flavor, or different flavorings like cocoa powder or fresh strawberries for chocolate or strawberry milk. My personal favorite is the vanilla cashew milk recipe below.Benefits of Making Your Own Nut Milk
Now you know how easy it is to make homemade nut milk… but why should you? The primary benefits touch upon cost, quality, taste, and nutrition.Cost Savings
First, this DIY is completely budget-friendly. Most store-bought varieties use thickeners in order to cut down on costs by using fewer nuts. With your homemade batch, you can use as little as a half cup to 4 cups of water. That being said, using more nuts yields a richer texture. We recommend a 1:4 ratio of nuts to water, but feel free to experiment and come up with what you (and your wallet) prefer!Quality Ingredients
Luckily, you can control every ingredient going into your nut milk! Look at the ingredient label on most packaged alt milks, and you’ll see a long list of ingredients like oil, guar gum, carrageenan, and gellan gum. Perhaps you’re even thinking what the heck they are. The extra ingredients typically act as thickeners that provide its smooth texture, prevent separation, and extend shelf life. However, they’re really unnecessary! The best option for plain nut milk is just two ingredients: nuts and water.Fresh Taste
The taste of homemade nut milk is far superior to any store-bought option. It’s rich and creamy, and actually tastes like the nut you made it with. Often, store-bought kinds are made from mostly water and contain only two percent of the actual nut.Nutritional Value
Since you can make homemade nut milk with more nuts than what you’d find in store-bought kinds, it has more nutritional benefits. Your DIY nut milk will pack more protein, healthy fats, and a higher concentration of natural vitamins and minerals than unfortified store-bought varieties! However, store-bought nut milk is often fortified. So if you rely on the fortification of B12, vitamin D, and iron in your nut milk, you may consider adding additional supplements or a multivitamin to ensure you’re meeting the recommended daily intake of these essential nutrients.PREP
0 minutes
0 minutes
COOK
0 minutes
0 minutes
SERVES
1
1
INGREDIENTS
INSTRUCTIONS

More like this